Announcing Ruby on Mac version 2.0
After several months of hard work, Ruby on Mac 2.0 is finally ready! The biggest change is that I can now officially license and distribute Ruby on Mac. Instead of downloading a zip file, you will get a Mac installer .pkg file. This makes it more secure for you because you can verify that the file actually came from me.
This article covers the following topics:
- How to download and install Ruby on Mac 2.0
- New features in Ruby on Mac Ultimate
- Other improvements in Ruby on Mac Ultimate
- Behind the scenes about the licensing and distribution work
How to download and install Ruby on Mac 2.0
Step 1
After you buy Ruby on Mac, you’ll receive an email from Paddle with a link to download your Ultimate.rom-license or Prime.rom-license file. Please move the file to your Downloads folder if it doesn’t automatically get saved there. I also recommend saving it in a safe place like 1Password.
If you’ve never saved a file in 1Password, here’s one way to do it:
- Launch 1Password for Mac version 8
- Click on the blue “+ New Item” button and choose “Software License”
- Replace the title “Software License” with “Ruby on Mac Ultimate (or Prime)”
- Click on “+ add another field” then scroll all the way down and select “Attach a File”
Note that the license download link expires after 24 hours. If it expires before you get a chance to download the license, email me at moncef@rubyonmac.dev and I’ll send you your license file.
Step 2
Click on the blue download button in that same email from Paddle to download the Ruby on Mac .pkg installer. The filename includes the flavor of Ruby on Mac and its latest version number. For example: rubyonmac-ultimate-2.0.16.pkg
Please move the file to your Downloads folder if it doesn’t automatically get saved there.
Step 3
To verify that the .pkg file was signed by my Apple Developer account, run the command below in your terminal:
pkgutil --check-signature ~/Downloads/rubyonmac-ultimate-2.0.16.pkg
The command assumes the file you downloaded is called “rubyonmac-ultimate-2.0.16.pkg”. Adjust the command as necessary depending on which flavor and version you downloaded.
In the output, you should see:
Developer ID Installer: Moncef Belyamani (5NB2AVZQPV)
You can also use an app called Suspicious Package to inspect the contents of a .pkg before you install it.
Step 4
Double-click on the .pkg file to install Ruby on Mac, and follow the instructions. If you get prompted to allow Installer to access files in your Downloads folder, click OK. When it’s done, you should end up with a “rubyonmac-ultimate” or “rubyonmac-prime” folder in your Downloads folder.
If the installer fails, try installing the .pkg from the terminal with this command:
sudo /usr/sbin/installer -pkg ~/Downloads/rubyonmac-{flavor}-{version}.pkg -target /
Replace “{flavor}” and “{version}” to match the actual .pkg filename.
Step 5 (for existing customers only)
Whether or not you customized the ~/rubyonmac/rom-custom file, you’ll need to make the following changes:
- Change
#!/bin/shto#!/bin/bashat the very top of the file - Add
source ./functions/logging.shas the second line.
Here’s what the first 3 lines should look like:
#!/bin/bash

source ./functions/logging.sh

info_echo "Running your customizations from ~/rubyonmac/rom-custom ..."
Step 6
You can then run Ruby on Mac with this terminal command:
cd ~/Downloads/rubyonmac-ultimate && /bin/bash install
For more detailed installation instructions, terminal themes for the best visual experience, how to check if the script worked, what to do after the script finished, how reset mode works, and much more useful information, open “rom-ultimate-docs.html” (or “rom-prime-docs.html”) in your favorite browser.
You can find this file either in the ~/Downloads/rubyonmac-ultimate folder, or in the ~/rubyonmac folder that was created after running the command in step 5. Note that your license file will get moved from ~/Downloads to ~/rubyonmac.
New features in Ruby on Mac Ultimate
In version 1.x, the initial dev environment setup was run via a Bash script. After that, Ultimate customers could use the rom CLI (written in Ruby) to perform other actions, such as installing/uninstalling/reinstalling Ruby versions. However, making changes to Git preferences, macOS preferences, and GitHub repos required reading the docs to remember the name of the files, and the non-CLI command to use for each one.
Now, almost everything can be done with the CLI, and I’m planning on making other actions easier to perform. The main new additions to Ruby on Mac Ultimate 2.0 are rom setup and rom license.
rom setup
This new command allows you to easily set and edit your Git preferences, macOS preferences, and GitHub repos you want to clone. Note that if you’re an existing customer and you’ve already set these preferences with Ruby on Mac, you don’t need to run these commands individually when setting up an additional Mac.
If you want to apply the settings to your new Mac, simply copy over your ~/rubyonmac folder from the old Mac to the new one, then download and run the .pkg installer as described at the beginning of this article, then run this command:
cd ~/Downloads/rubyonmac-ultimate && /bin/bash install-newmac
If you haven’t yet set your preferences, or if you want to make changes and quickly apply them without having to run the entire Ruby on Mac script, then keep reading.
rom setup git
rom setup git
This will apply the settings defined in ~/rubyonmac/gitconfig/gitconfig.yaml. If ~/.gitconfig and/or ~/.gitignore_global don’t exist, it will create them based on the ones provided by Ruby on Mac in ~/rubyonmac/gitconfig.
If you want to overwrite your existing ~/.gitconfig and ~/.gitignore_global with the ones provided by Ruby on Mac, you can use the --force option:
rom setup git --force
To make changes to the various gitconfig files, use the --edit option and specify the file you want to edit:
rom setup git --edit yaml
This will open ~/rubyonmac/gitconfig/gitconfig.yaml
rom setup git --edit gitconfig
This will open ~/rubyonmac/gitconfig/.gitconfig
rom setup git --edit gitignore
This will open ~/rubyonmac/gitconfig/.gitignore_global
rom setup git --edit brewfile
This will open ~/rubyonmac/Brewfile-rom-custom so you can install your favorite text editor that you want to set as the default editor for Git commits.
rom setup repos
rom setup repos
This will clone the GitHub repos defined in ~/rubyonmac/repos/repos.yaml. If all the repos in the file have already been cloned, it will let you know. Otherwise, it will go through the file and clone any repos that haven’t already been cloned.
To make changes to the YAML file, run the command below, which will open the ~/rubyonmac/repos/repos.yaml file:
rom setup repos --edit
Then you can apply the changes with rom setup repos.
rom setup macos
rom setup macos --edit
This will open ~/rubyonmac/macos-prefs/macos-prefs.yaml so you can review the settings and customize them. You can then apply the settings with this command:
rom setup macos
Note that some settings might require you to log out of macOS and back in, or restart your computer for them to take effect.
If there are any settings that you typically set when setting up a new Mac that are missing from the default macos-prefs.yaml, let me know and I’ll add them for you!
Another related feature I’m planning on adding is making it easier to sync these preferences between computers using chezmoi, my favorite dotfiles manager. I wrote about this a few years ago in a post titled Automating the Setup of a New Mac With All Your Apps, Preferences, and Development Tools. Parts of the post are outdated, but it will show you how chezmoi works. The idea is to automate much of the steps in that blog post.
rom script
This is the command you’ll be running the most. I recommend running it about once a week to keep your system up to date. It now has the following new options:
--first-run --allow-rosetta --newmac --fish --verbose
--first-run is what the install script uses when you first install Ruby on Mac. It pauses to let you review your license details, to make sure your email and name are correct. Then, it pauses again to let you know what’s going to happen. At the end, it displays important things to do and prompts you to open the Post-Installation Guides.
The next time you run the script with just rom script, it won’t pause or prompt you to read the docs at the end. You typically won’t need to use the --first-run option, but if you ever want to, you can use like this:
rom script --first-run
--allow-rosetta is only used the first time you need to set up Ruby on Mac in order to install Ruby versions older than 2.6.10 on Apple Silicon Macs. Before you can run Ruby on Mac with Rosetta, you need to run it in native mode first. Step-by-step instructions are in the section “Installing Ruby versions older than 2.6.10” in the rom-ultimate-docs.html file.
The --newmac option is used by the install-newmac script when setting up a new Mac. The only difference between the regular install script and install-newmac is that the newmac script sets macOS preferences in addition to everything else.
If you started with the regular installation, and later you want to set macOS preferences, it’s probably easier to use rom setup macos --edit and then apply the changes with rom setup macos, as opposed to running rom script --newmac.
The --fish option is used when you want to switch from zsh or bash to fish. It will take care of everything for you, including installing fish if you don’t already have it. You can set up fish with this command:
rom script --fish
More details are in the Ruby on Mac docs in the section called “Set up the fish shell”.
Finally, the --verbose option is what you would expect: it prints out more information to the terminal when running the script. Currently, the only place that includes verbose output is when decrypting and validating the license.
rom license
This allows you to manage your Ruby on Mac license. The available commands are activate (which is aliased to verify, meaning they both do the same thing) and deactivate.
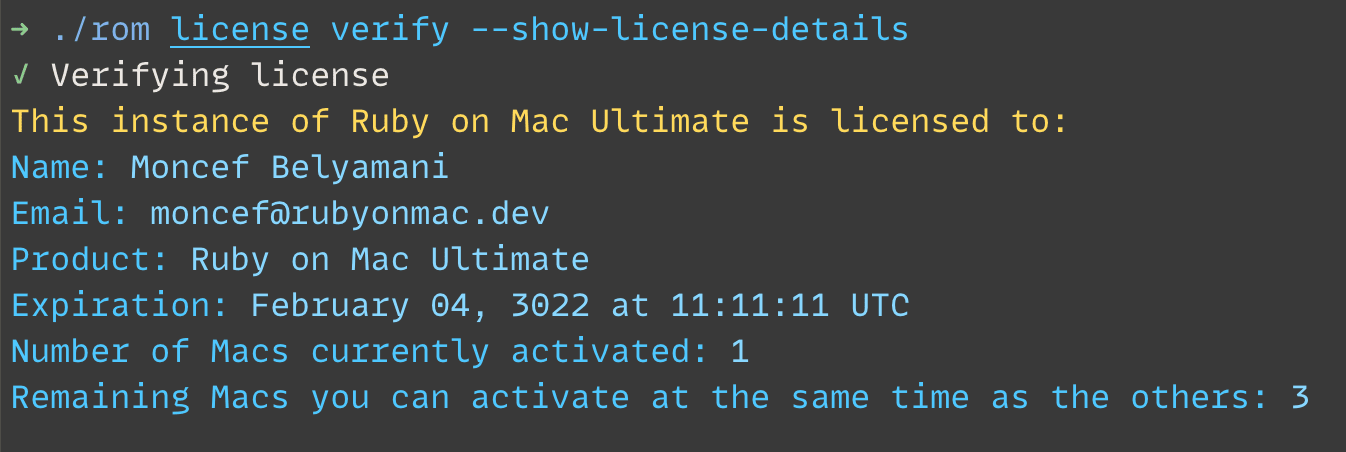
You will typically never need to run rom license activate directly, but if you ever want to see your license details, you can run this command:
rom license verify --show-license-details
Here’s a sample output:
Other improvements in Ruby on Mac Ultimate
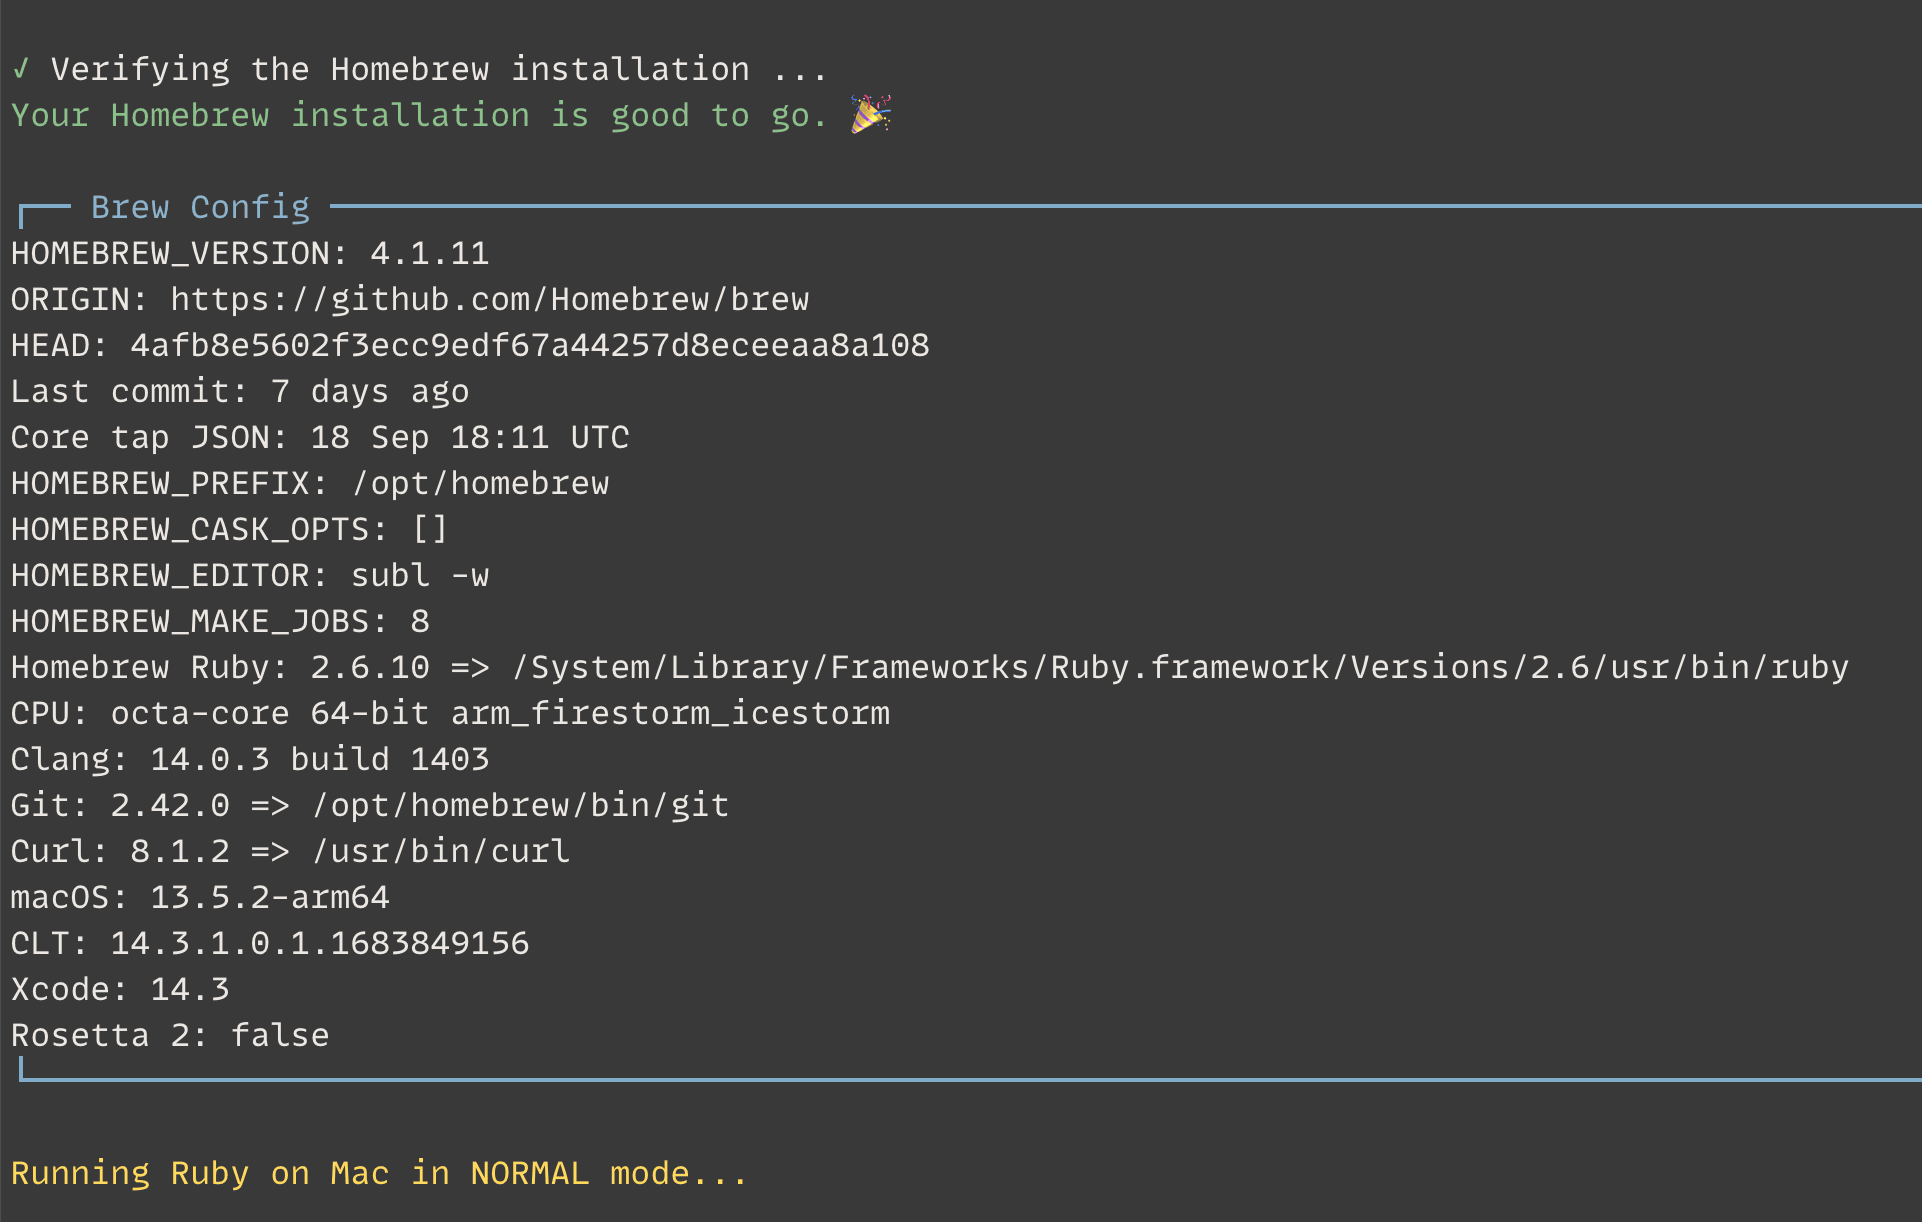
- The terminal output has been improved visually, and most error messages are now even more helpful. Output that goes together, such as debugging info, is now better separated visually. Here’s an example:
- Node will now be updated automatically whenever a newer version is released.
- Logs will now be appended to the same file, as opposed to creating a new file each time you run the script. Logs will be rotated monthly. This means less clutter for you, and it means less files for you to attach when you email me for help.
- Fixed bugs with setting up the fish shell for the first time, and made it easier.
- Fixed other various bugs in the main script
Behind the scenes about the licensing and distribution work
Ruby on Mac Prime and Ultimate have different limitations. For example, Prime customers can only run Ruby on Mac on 1 Mac per license. Ultimate customers get 4 Macs, but for a single user only. Teams must buy a separate copy of Ultimate for each team member, or buy the Ultimate Team license, which covers up to 25 people.
Similarly, Prime customers can only use the product for one year (unless they upgrade to Ultimate), but Ultimate customers get unlimited usage and free updates (this might change in the future for new customers).
In order to enforce these limitations in a way that can’t easily be bypassed, I had to rewrite most of the code from Bash to Ruby in order to generate a self-contained binary. Given my 14 years of experience with Ruby, this wasn’t difficult, but it was very tedious. Some parts, such as manipulating files with sed, were a lot more enjoyable to rewrite in Ruby.
Here are some more advantages of the rewrite and packaging as a self-contained binary:
Testing
I can actually test the code, and I found and fixed several bugs! There are various test frameworks for Bash, but it did not seem like any of them could mock the filesystem. I needed to be able to have a test run the real code that creates, modifies, and deletes files, but without making changes to my computer’s filesystem. With Ruby, this is super easy with the fakefs gem.
As of today, there are 615 tests (written with RSpec) that run in about 3 seconds.
User Experience
In version 1.x, the CLI was just a set of Ruby files living on the customer’s Mac, and since it was written using the thor gem, it required the thor gem to be installed in every version of Ruby so that it could be invoked regardless of the current Ruby version.
This slowed down the main Ruby on Mac script since it had to look up each Ruby version installed on the machine, then check if thor is installed, then install it if not. In addition, some of the code isn’t compatible with Ruby versions older than 2.5.9, so I had to detect the current active version and ask the user to switch to a newer version.
The new rom CLI can run whether or not Ruby is installed, and whether or not thor, or any other dependencies, are installed on the customer’s Mac. And it doesn’t matter which version of Ruby is currently active.
Future Proof
Let’s say I discovered a bug that could cause the main script to fail, but right before I released a new version with the fix, a customer bought and downloaded the previous version of Ruby on Mac. In order to let them know a new version is available, one of the first things the old Bash script did was compare the version on the customer’s Mac with the latest published one.
While it’s possible to write this version check in Bash, it was much easier for me to write it in Ruby, and since Ruby comes preinstalled on macOS, the Bash script could run the Ruby version comparison script using the system Ruby. For example:
if ! /usr/bin/ruby "scripts/compare_versions.rb"; then
  error_echo "There's a newer version of Ruby on Mac Ultimate with bug fixes and improvements."
  info_echo "Would you like to update now? (y/n)"
  read -r -n 1 response
  if [ "$response" = "y" ]; then
    /usr/bin/ruby "scripts/update.rb"
    exit
  fi
fi
However, it’s not guaranteed that Apple will continue to preinstall Ruby on macOS. Back in 2019, they mentioned that they might stop preinstalling scripting languages, and they did indeed remove Python in Monterey 12.3.
In version 2.0 of Ruby on Mac Ultimate, the only remaining Bash scripts are the initial installation scripts that create the ~/rubyonmac folder and move the required files there. Everything else is in Ruby, and run via the self-contained binary. This means that the new rom CLI, and the version comparison that it performs, can run whether or not Ruby is installed.
Another thing that needs to happen early on, and before running most CLI commands, is to verify the license is valid. I’ve made this process as seamless and fast as possible, but there’s a lot that’s happening behind the scenes. This was one of the most fun and interesting projects I’ve worked on. The first time I talked about this process publicly was in my lightning talk at the Blue Ridge Ruby conference.
There seemed to be interest about this topic, so I pitched a full-length talk to the Rocky Mountain Ruby conference, and it got accepted! It’s in Boulder, Colorado from October 5-6. You can still get tickets. I’m also planning on converting the talk to a blog post, but I’m not sure when.
At a high level, here are the various components:
- A small macOS app written with SwiftUI that generates the token needed to use Apple’s DeviceCheck API. This is what allows me to check whether or not a Mac has been activated by a customer, in a way that preserves privacy.
- The gitlab-license gem to generate, encrypt, and decrypt the licenses.
- A Rails app that receives the order information from Paddle, stores the customer info in a Postgres DB, generates the license, and sends the link to the license back to Paddle so that Paddle can email it to the customer. This same app activates, verifies, and deactivates licenses via Apple’s DeviceCheck API.
- ruby-packer to generate a self-contained binary of the Ruby on Mac code.
- A Bash script to automate releasing new versions, including all the necessary steps needed to generate an official codesigned .pkg installer notarized by Apple.
That’s it for now. I hope you enjoyed this overview, and thanks for your support!